Task Checklist
Every job carries a work plan: task groups (for example Full Service or Front Brake Pad Replacement), each with numbered steps and a time estimate. It is generated from the booking, the job type, the AI diagnosis and -- on a service -- your Vehicle Health Check. You work it in the Workflow card on the Work tab.
The plan always holds the booked work. From the moment the car is checked in, each booked labour line on the job is its own task group -- there is no wait for the AI, so nothing that will be invoiced is missing from your list. When the AI plan arrives it fills those same tasks with their steps (under headings such as Engine oil and filter); it does not replace them, and a step you already ticked stays ticked. With the AI off for your garage (or failed) the tasks stay as they are: one step each, named as the desk named the work. Extra work the customer approves is added after the booked work -- it never replaces it.
When the desk changes the booked work
The desk can change the labour on a job while you have it:
- A labour line the desk adds becomes a new task at the end of your plan. On an open job you are told -- The desk added: Check wiper blades -- and the task carries an Added by the desk mark.
- A line the desk re-describes renames its task (The desk changed a task: … → …). Your ticks stay.
- A line the desk removes takes its task off your plan (Removed from the job: …). If you had already ticked a step on it, the task stays on the plan, struck through as Not needed with the reason Its labour line was removed from the job, and your ticks are kept -- ask the desk if that looks wrong.
A labour line you add yourself for time spent is not a task to do, so it does not appear on the plan.
The plan is ordered for you: safety-critical work first, then repairs by severity, then service items, then advisories. A Fix Order note at the top says why.
Guided and All
The toggle at the top right of the Workflow card switches views:
- Guided -- one item at a time, in priority order, with Previous / Next and an x of y counter. The chips under the header are the items; tap one to jump to it. This is the default.
- All -- every item as a compact list with its badges and done count. Tap any row to open it in Guided.
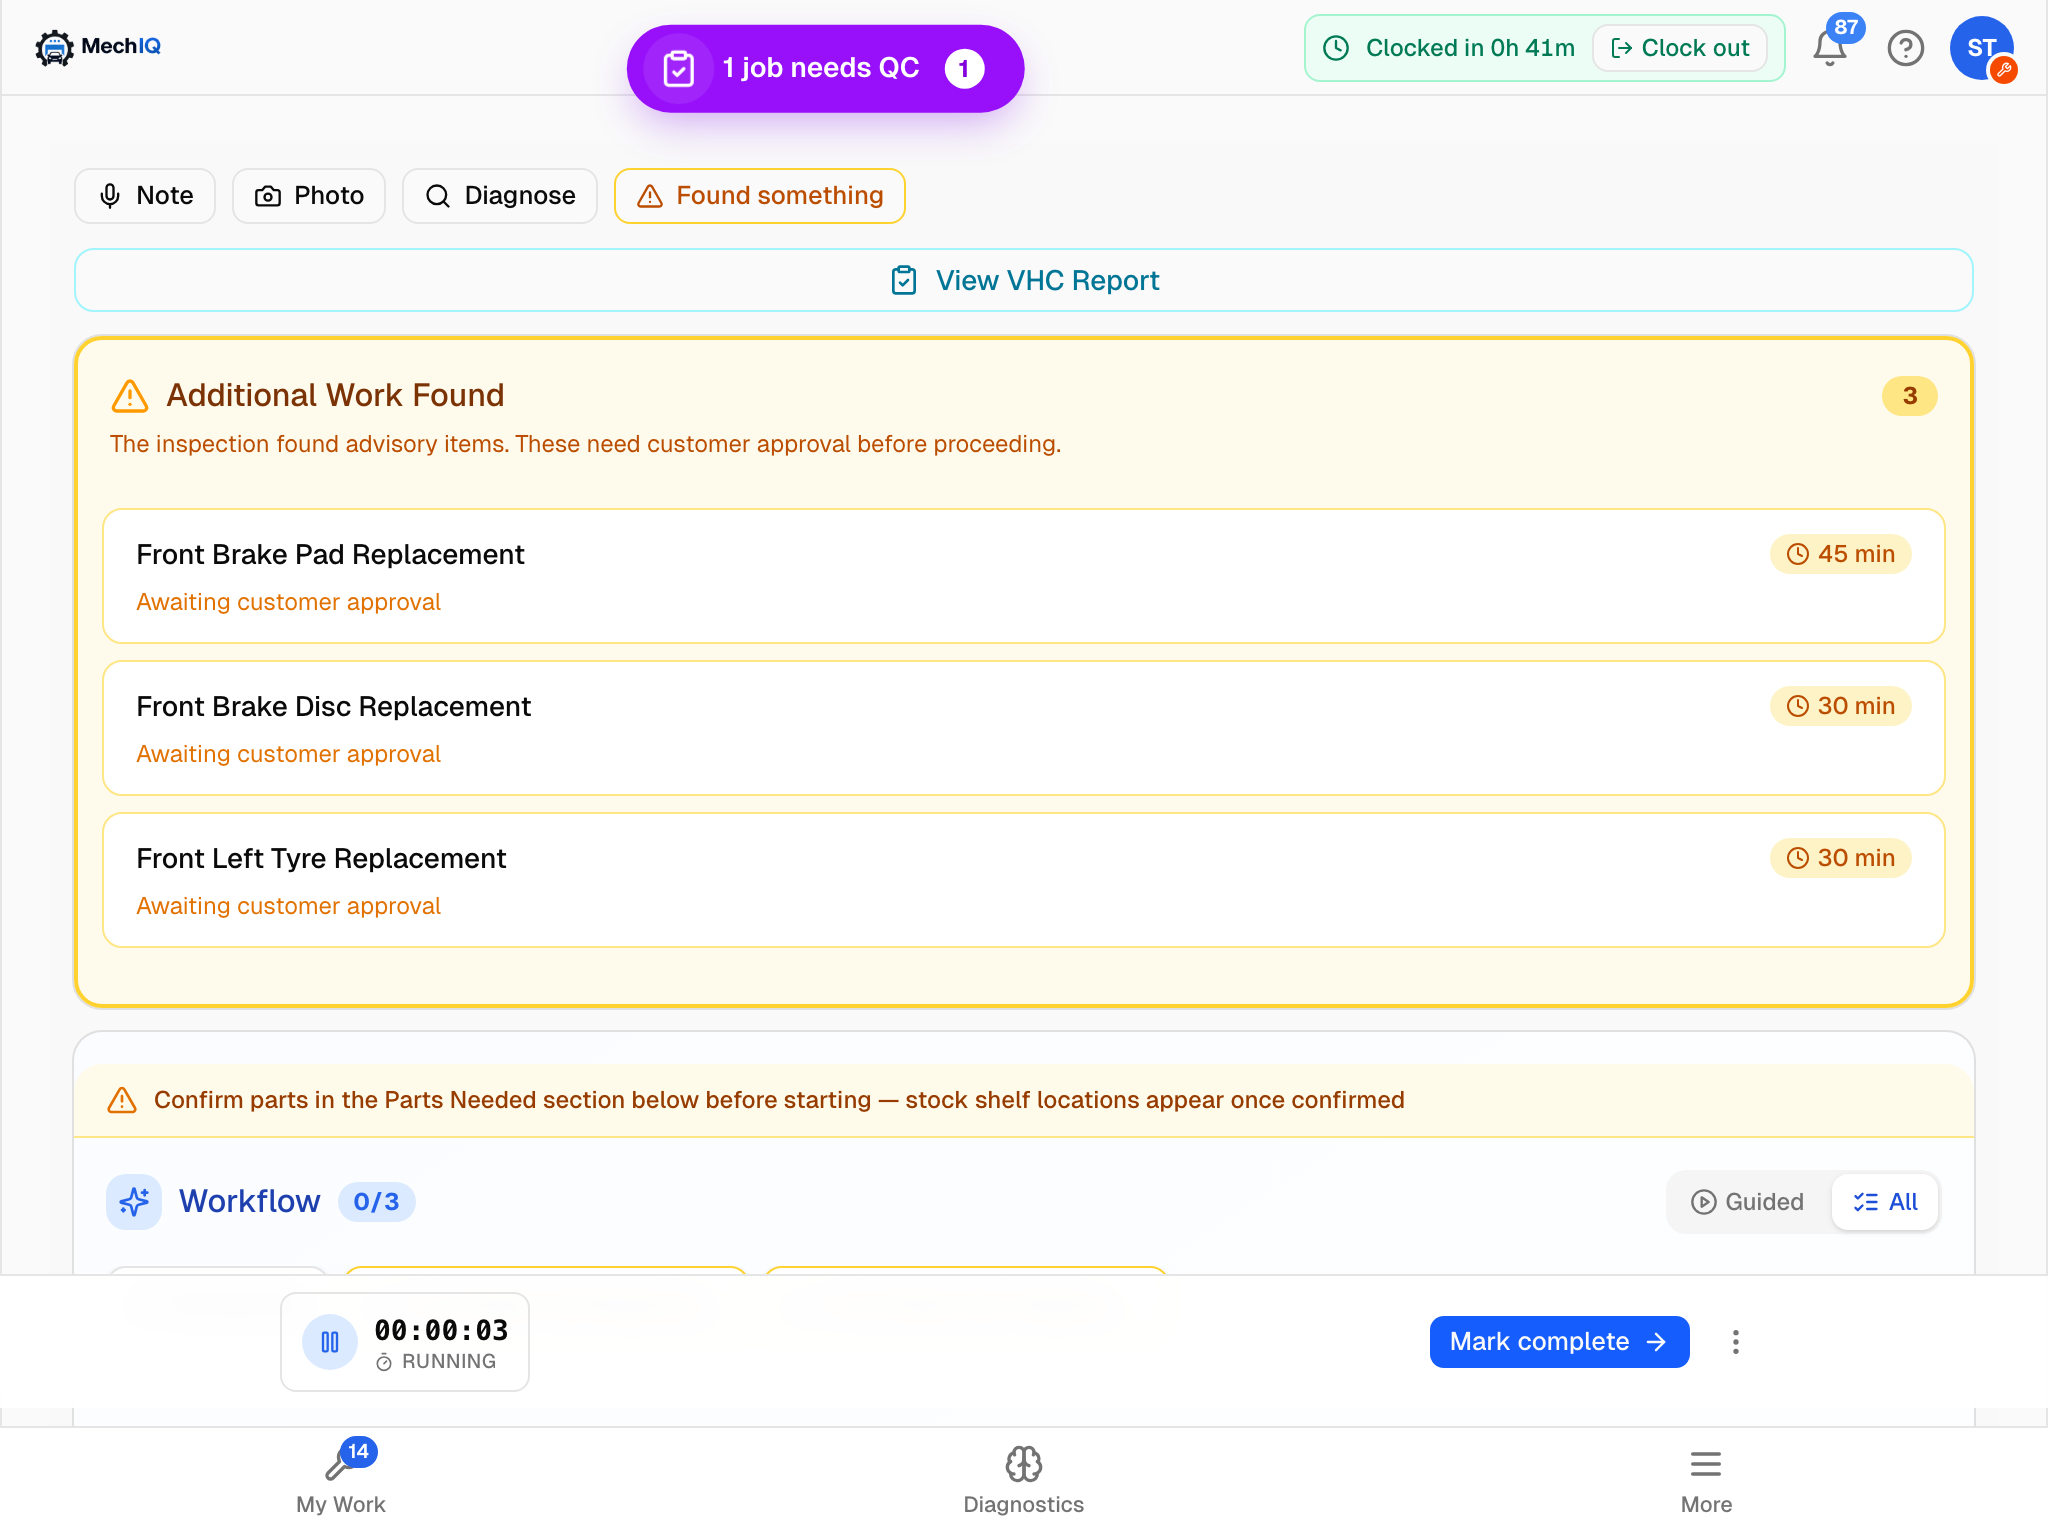 All view. Groups that came from the inspection carry a VHC badge; amber rows are still waiting on the customer.
A task group in Guided view
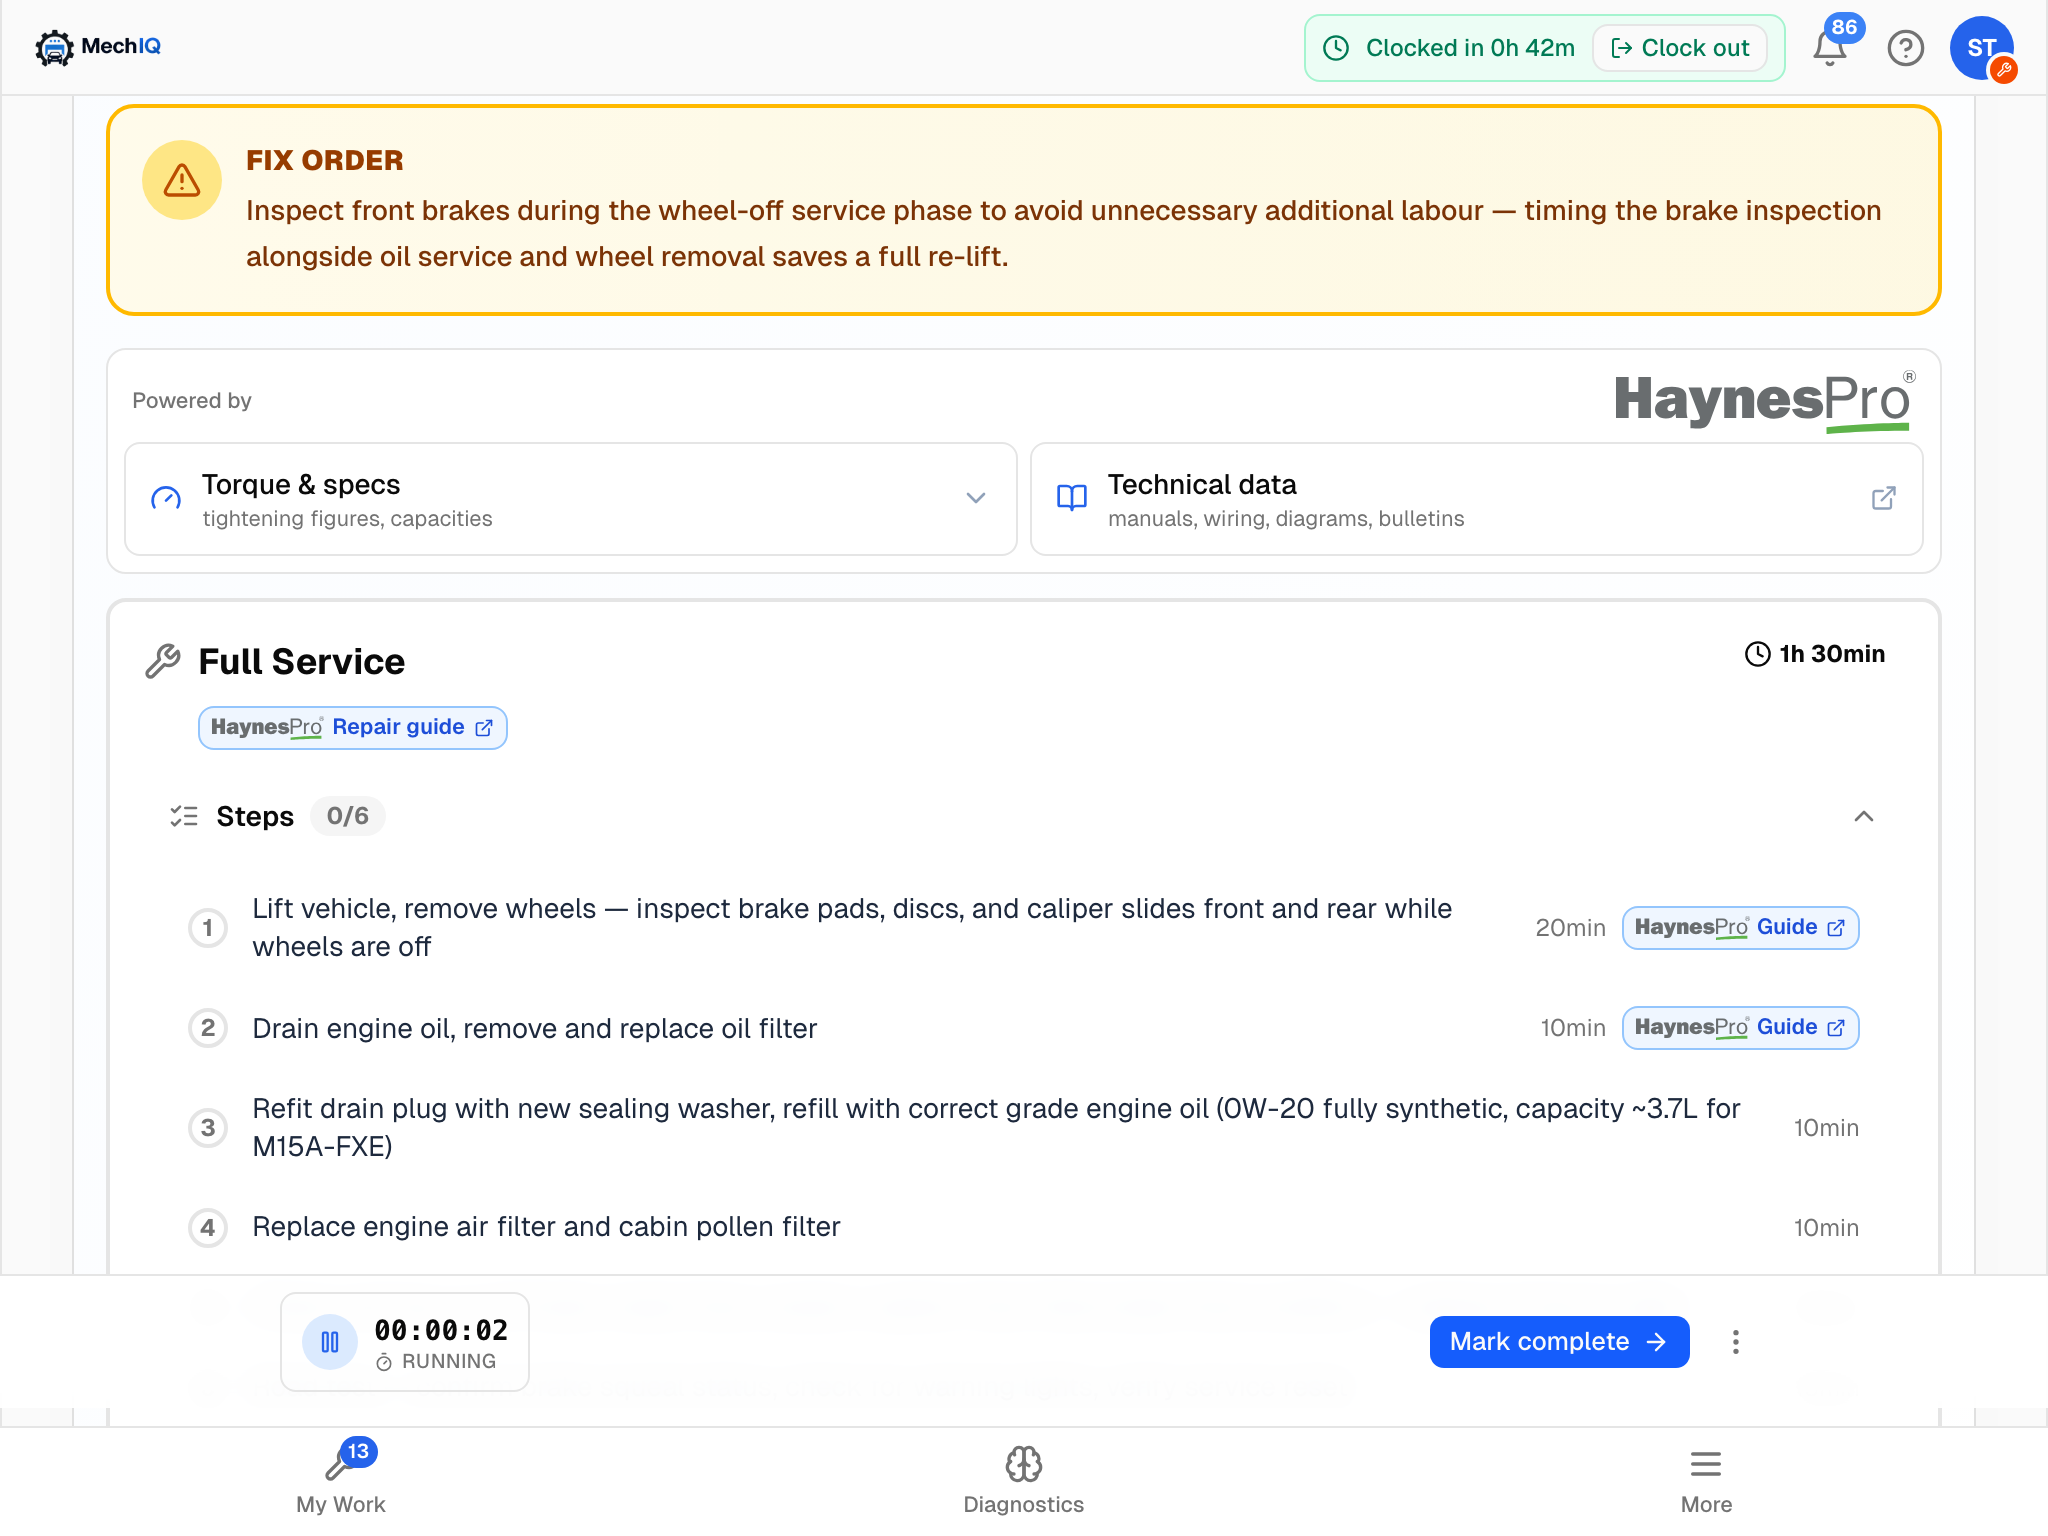 A task group. Tick the numbered steps as you go; the HaynesPro chips open the manufacturer's procedure for that step.
Each group shows:
- The label, an italic reason when the AI has one, and the estimated hours pill.
- Repair guide and Torque & specs chips (HaynesPro) where the manufacturer has a procedure or a spec table for that system. See Technical Data.
- Badges: Approved (customer-approved extra work), Awaiting Parts, Parts Being Sourced.
- Steps N/M -- the numbered steps. Tap a step to tick it; tap again to untick. Each step can carry its own time and a Guide chip.
Under the steps are three buttons:
- Complete -- ticks every step in the group and moves you to the next item.
- Not needed -- the work is not needed. A dialog asks why (Inspected -- fine, Already done, Not applicable, Wrong diagnosis, and/or your own words -- you can dictate). A quick reason and your words are kept together as Not applicable -- your words. The dialog says what happens to that task. On a task MechIQ estimated, Not needed strips the group's labour and the parts only it needed. On a task that was quoted or added by the desk, the task comes off your plan but its charge stays on the bill: the desk will decide whether it comes off the bill, and the desk gets a to-do with your reason. Either way it teaches the AI to over-reach less. You are then offered Task not needed -- log inspection time? so the time you spent checking is not lost: enter the hours and Log Time, or No thanks.
- Found something -- you found extra work on this step (a split boot, worn pads). It opens the same form as Found something on the job: describe it, add a photo, and Send to the desk to price -- it goes to the desk at once as extra work to price -- or Continue as part of this job for small stuff the booking covers. Something stopping you (a seized bolt) goes in a job note instead.
Use Not needed for your own call that the work is not needed. If the customer declined work, that is handled through the approval flow and the group shows Customer declined this work on its own.
On extra work found on the job (a package the customer was asked to approve), your Not needed takes that line out of the package: it is no longer in the package total, the customer is not asked about it, and it is not invoiced -- even if its parts were already confirmed. Nothing is deleted, so you can undo it. If the customer already has the approval link, the line comes off the link. If the customer already approved it, the desk gets an action to tell the customer and to cancel or return any parts ordered for it. The desk sees the line struck through as Technician: not needed -- [your reason].
To undo your own call, open the group and press Needed again. The line goes back into the package (and back onto the customer's link, if it was sent). You can't undo a line the customer declined or the desk marked not needed, or one the desk had already sent to the customer without it -- ask the desk.
Groups you cannot tick yet
- Awaiting Approval -- a conditional group the customer has not decided on. This work needs customer approval before you can proceed. It also appears in the Additional Work Found card above the Workflow.
- Approved -- awaiting parts -- approved extra work whose parts have not landed. It sits under the Workflow as a greyed row until the parts are in.
- Not needed -- … -- the AI dropped it after a re-diagnosis; the reason is shown.
- Not needed -- Technician: not needed -- … -- your own earlier decision. Needed again undoes it.
A not-needed task has a grey Not needed mark, never the green done tick. It is not counted as done: the Workflow count reads, for example, 2 of 2 · 1 not needed. It does not stop you finishing the job.
Found work
Under the Workflow, the Found work card lists each piece of work you found on this job -- from the health check or Found something -- and what happened to it: With the desk (being priced or not sent yet), Sent to customer, Approved, Declined, Not needed or Cancelled. It shows no prices. After a health check that found nothing, it says Nothing found on the health check needs extra work. The app shows the same card under the work plan.
When the plan changes while you are on the job (approved work arrives, a re-diagnosis), a message says Work plan updated with how many tasks were added or are not needed. The count is the plan the server sent, task by task.
More
The Workflow shows the steps first. The Fix order note and the HaynesPro torque & specs sit under the work in one More row -- tap it to open them. The HaynesPro button in the job header opens the rest of the technical data from any tab.
"Is this needed?" on the native app
On the native app a conditional group shows Is this needed? with Not needed and Confirm. Not needed removes the task's labour and specific parts; Confirm reveals the steps. Not needed / Needed again and Tick all steps sit under each group. On extra work found on the job, Not needed does the same as on the web: the line leaves the package, and Needed again puts it back. The app asks for a reason the same way as the web.
Findings in the plan
On a diagnostic job the plan also contains the AI's findings, each with a severity, a recommended action and a step-by-step guide. You close those with a verdict rather than ticks. See AI Diagnosis in a Job.
When everything is done
Once every item is closed the Finish panel shows: the parts you used, your garage's finishing checks (by default Tools cleared, covers refitted, no loose items and Vehicle is clean and ready for collection -- tick each one), what a diagnosis found, a note, any steps you did not tick, and one Finish button. See Finishing a Job and the QC Handover.
If the plan was only diagnostic steps (a scan, an inspection) you get Report your findings above to generate next steps instead: enter the fault codes or what you found with Diagnose and the repair plan is built from it.
Tips
- Work top to bottom -- the order is the fix order.
- Ticking the last step of a group moves you on automatically in Guided view.
- The Confirm parts in the Parts Needed section below before starting strip at the top of the card means the parts are still the AI's guess. Confirm them on the Parts tab and the stock shelf locations appear.